
[ad_1]
A tiny BIOS chip lurks inside each laptop, sitting in your motherboard to breathe life into your system while you press the facility button. It not solely powers your PC, however helps shield it, too.
BIOS stands for fundamental enter and output system, and the BIOS chip initializes all the opposite units in your PC, just like the CPU, GPU, and motherboard chipset. However a few years in the past, motherboard producers—in partnership with Microsoft and Intel—launched a substitute for conventional BIOS chips dubbed UEFI (Unified Extensible Firmware Interface).
Virtually each motherboard delivery at present has a UEFI chip relatively than a BIOS chip (UEFI is a Windows 11 system requirement, in actual fact), however they each share the identical core function: getting ready the system as well into the working system. That mentioned, most individuals nonetheless name the UEFI the “BIOS” due to the familiarity of the time period.
Why it’s best to (or shouldn’t) replace your BIOS
Understanding your UEFI is necessary so you’ll be able to perceive how (and if) to benefit from the function updates and bug fixes that include the BIOS updates provided by motherboard producers.
 Thiago Trevisan/IDG
New chip and motherboard platforms typically obtain quite a few BIOS revisions early of their lifecycle, to work out bugs.
Your motherboard doubtless makes use of no matter firmware revision the motherboard producer was on again when it was constructed. Over the lifespan of a motherboard, producers launch new firmware packages or BIOS updates that can allow assist for brand new processors and reminiscence, or remedy generally reported bugs. For years, the one actual motive to replace to a more moderen firmware revision, nevertheless, is to resolve a bug in your UEFI or to swap in a CPU that’s newer than your motherboard.
Some folks wish to commonly examine for and replace their UEFI firmware packages simply to remain updated. At one time, this was thought of a dangerous follow, provided that the firmware updating course of can doubtlessly brick your motherboard in the identical manner that flashing a customized ROM on to Android cellphone can brick the system. It’s finest to not replace your UEFI firmware until there’s something particular that the up to date firmware gives that you simply want.
That mentioned, you most likely wish to keep on prime of BIOS updates in case you’re on a chip or motherboard platform that’s recent out of the gates. A number of motherboard BIOS updates had been launched early throughout the first generation of AMD’s disruptive Ryzen chips, and every supplied further efficiency and system stability. With Intel’s Alder Lake switching to a radical new hybrid core chip design this fall, and each Intel and AMD anticipated to roll out new motherboard sockets subsequent era, we might quickly be an period the place it is extra frequent to replace your BIOS whereas bleeding-edge kinks get labored out.
Methods to replace your PC BIOS
 Brad Chacos
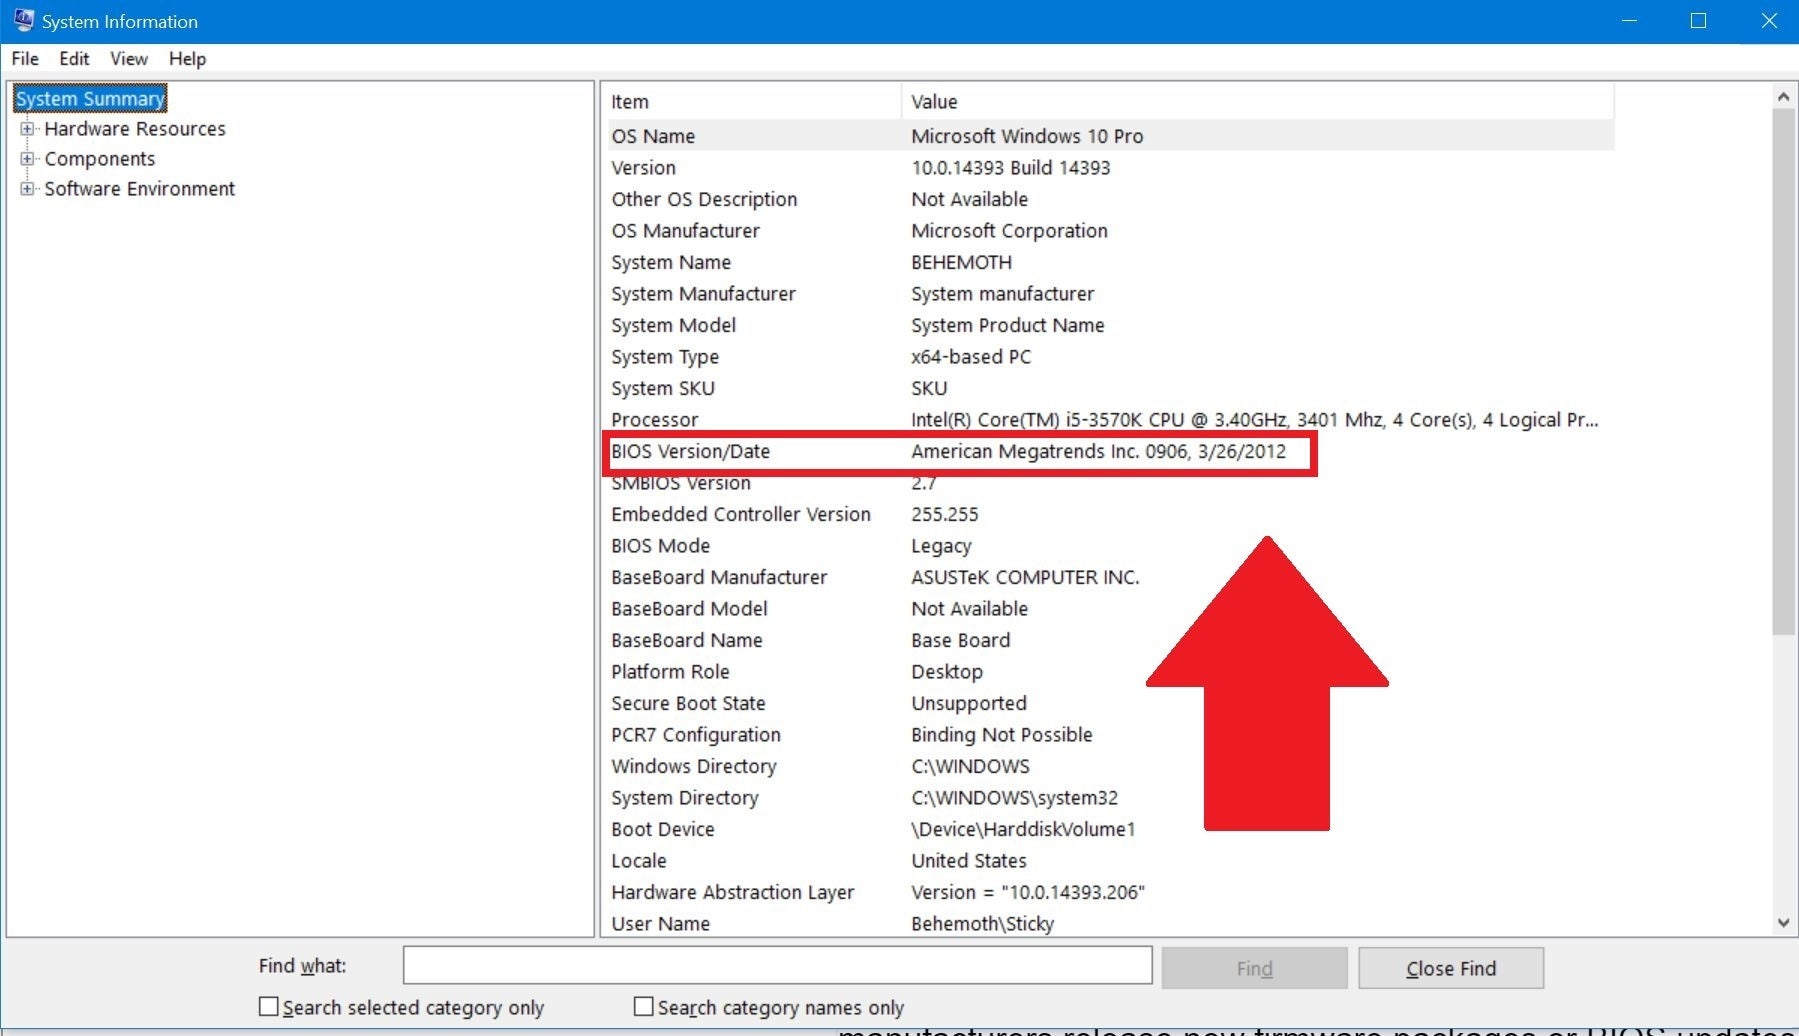
1. Discover your present BIOS model: Earlier than you improve your BIOS, ensure you’re truly putting in a brand new model. The best option to discover your BIOS model is to open up the System Info app by typing msinfo into the Home windows search bar. Within the window that opens, your BIOS model ought to present up on the correct, below your processor velocity. File your model quantity and date, then evaluate it to the newest model obtainable in your motherboard’s assist web page on the producer’s web site.
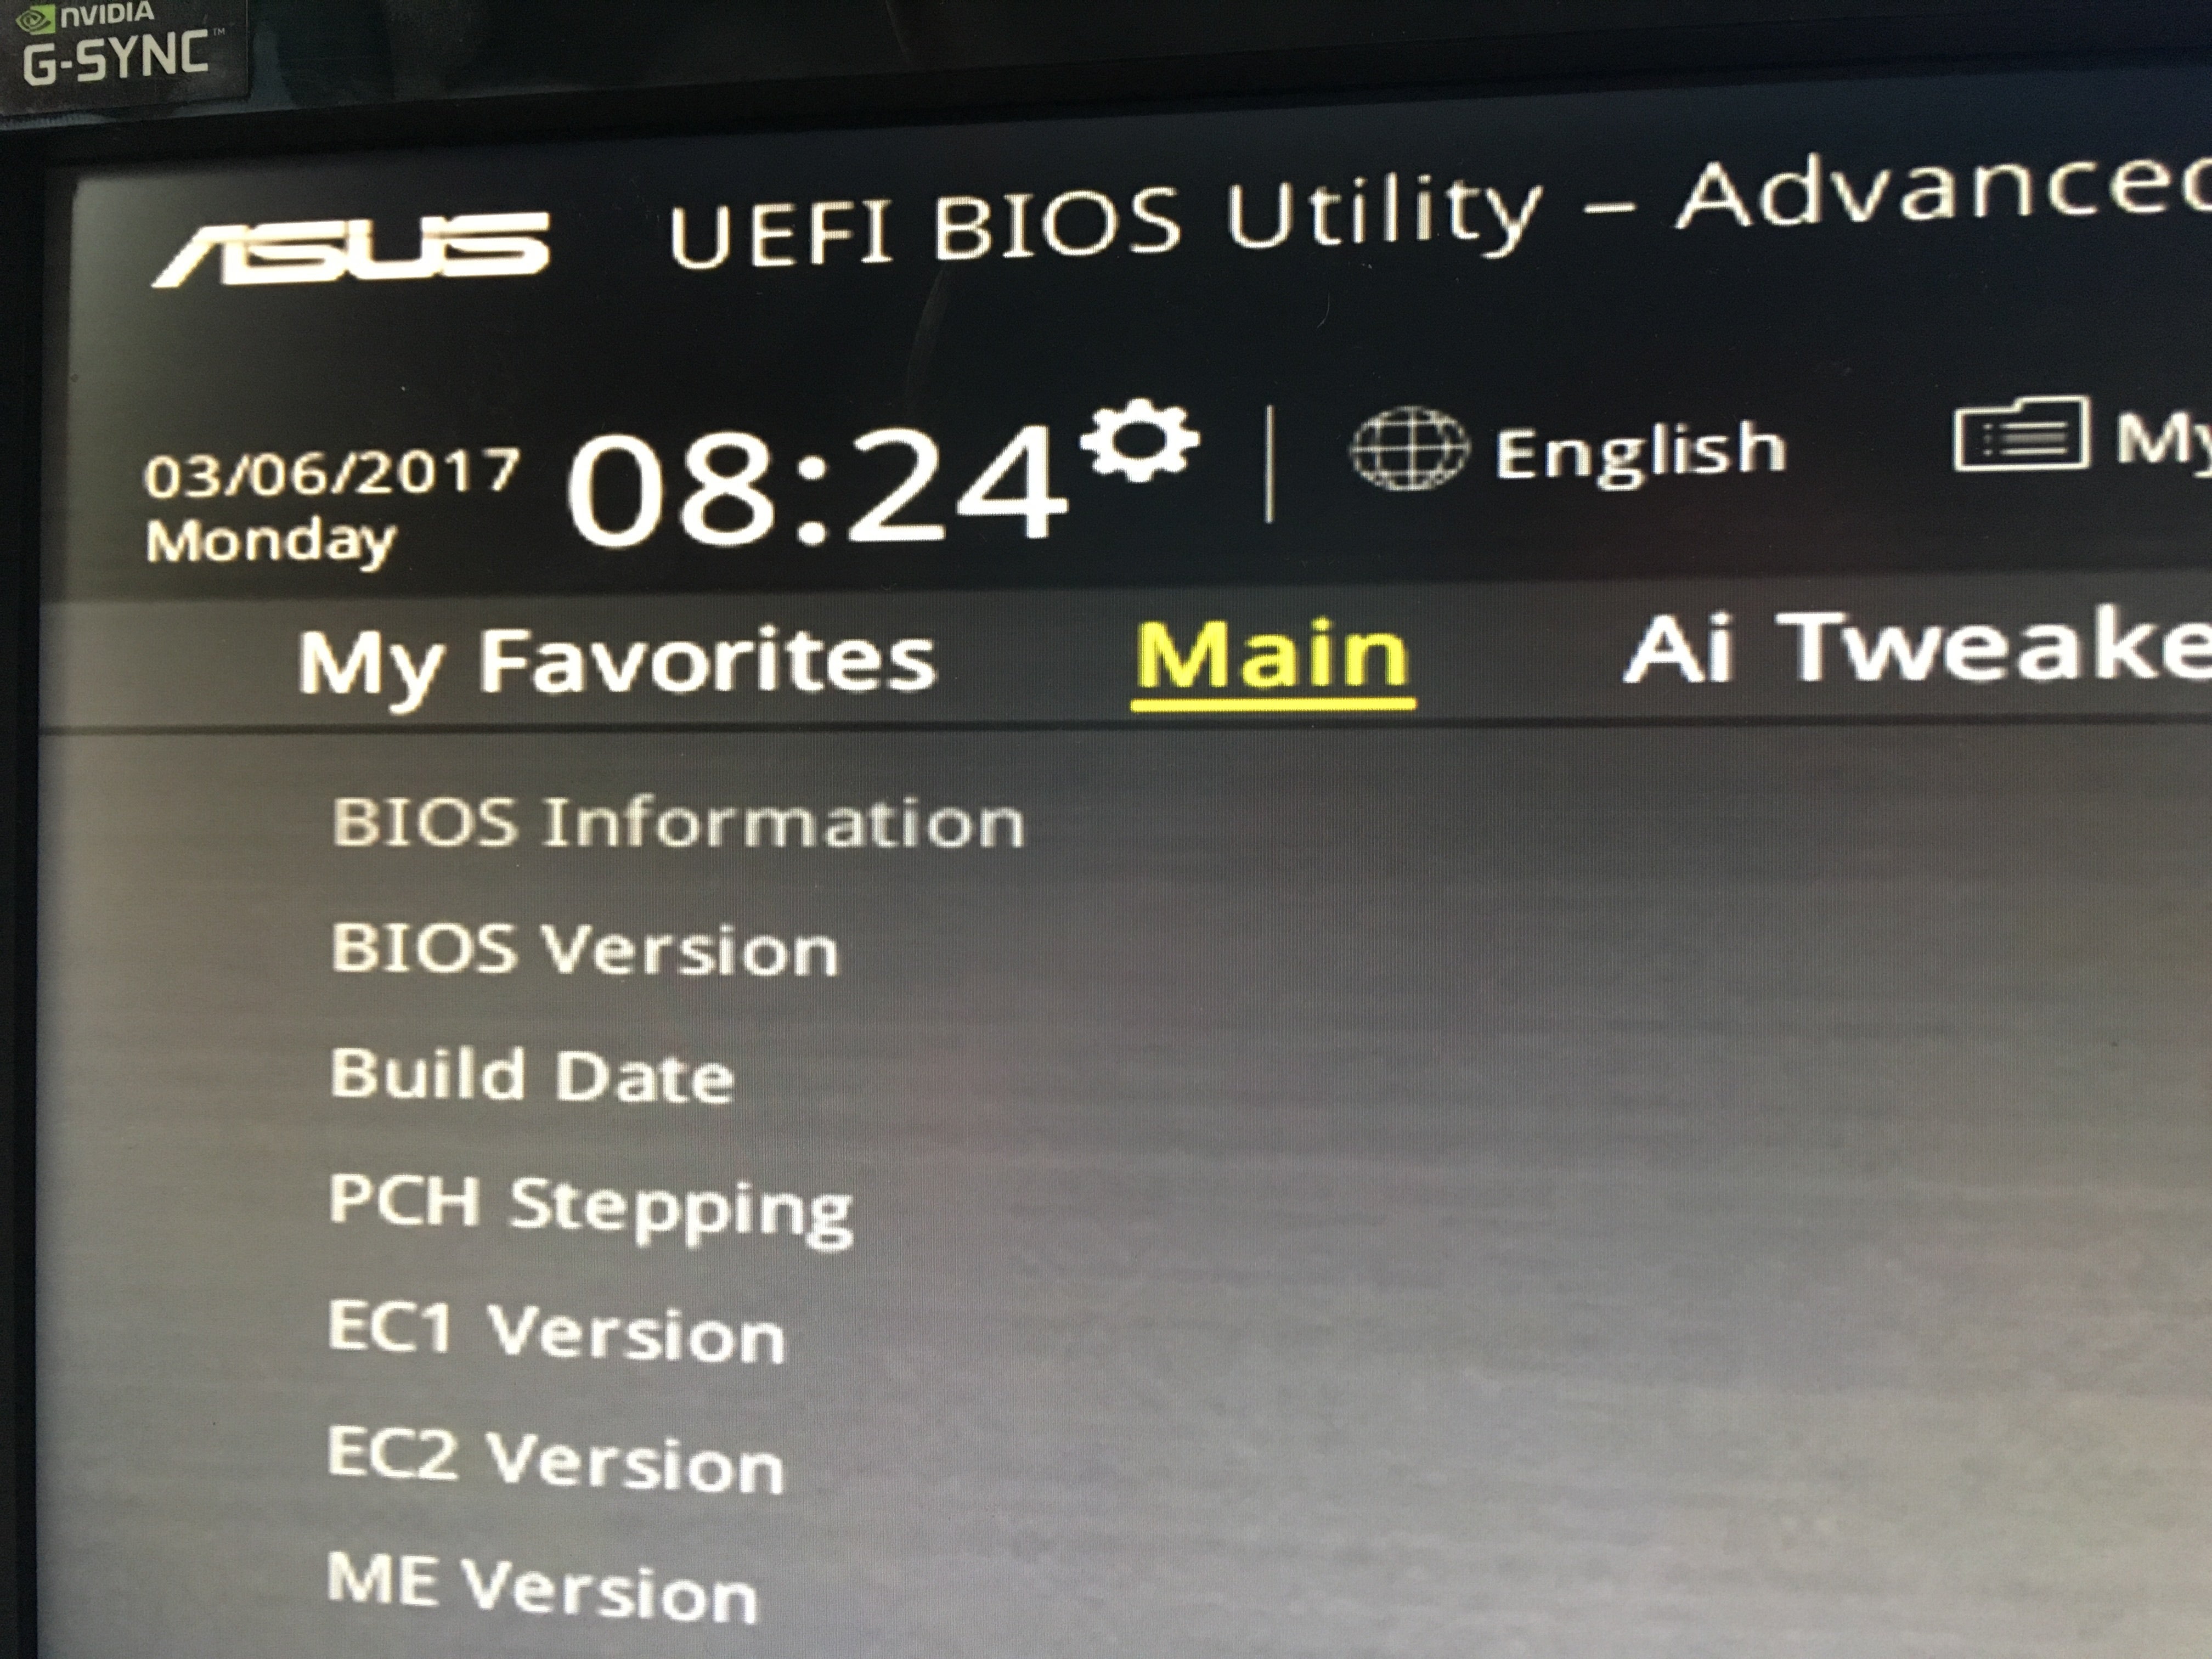
2. Enter the UEFI BIOS: Once you boot up your PC, you’ll see textual content that informs you which of them button to press to enter the UEFI BIOS. Press it! (The precise button wanted, and the design of each motherboard’s precise UEFI management panel differs, so these directions shall be extra guideposts than step-by-step directions.)
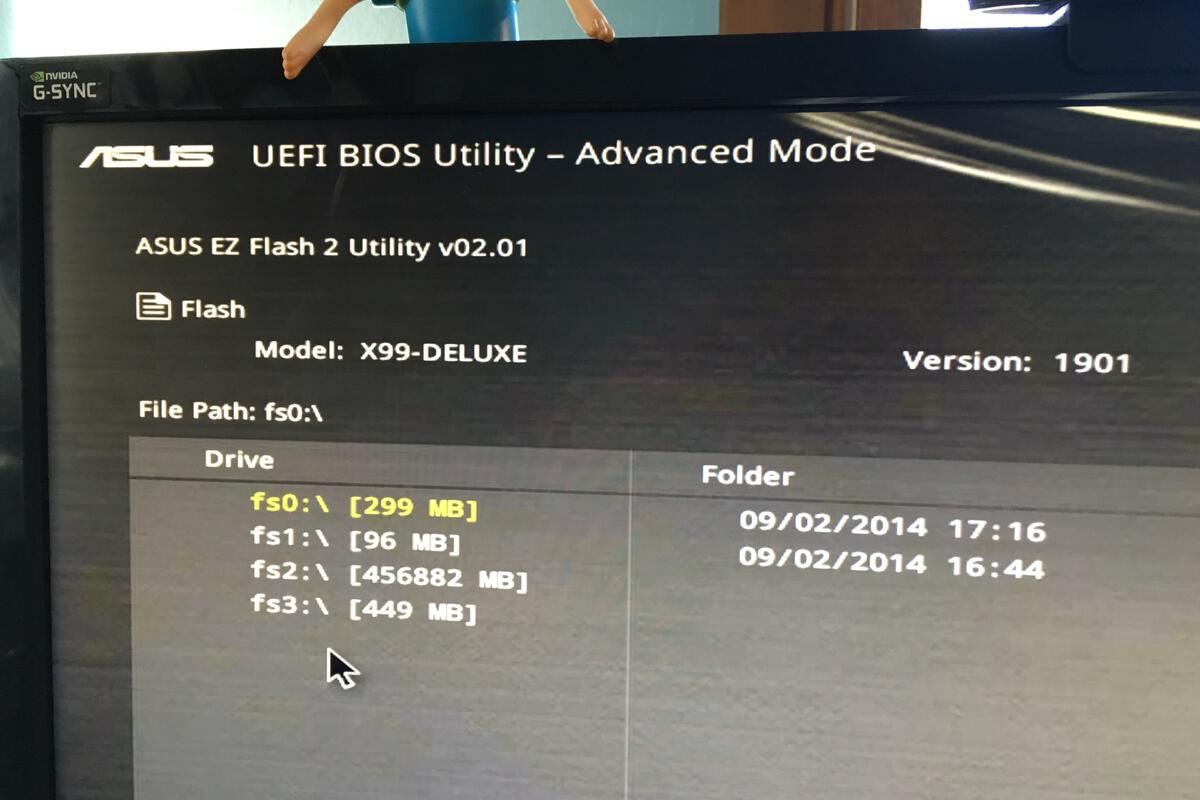
3. Boot into the UEFI management panel (when attainable): Though not all motherboards supply this function, on sure fashions you’ll be able to boot into the UEFI management panel and use a built-in replace utility to hook up with the web and flash the newest firmware from the manufacture’s server. This extraordinarily good function makes updating to newer firmware revisions as painless as attainable.
The method is a little more concerned for motherboards that don’t assist this function.
 Brad Chacos
4. Discover the newest BIOS replace out of your motherboard’s assist web page: Go to your motherboard’s assist web page on the producer’s web site. The most recent BIOS replace must be within the assist and downloads part.
5. Obtain and unzip the BIOS replace file
6. Switch replace file onto a USB flash drive
7. Reboot your laptop into the UEFI management panel
8. Launch the UEFI’s firmware replace device or flashing device and again up your PC’s present firmware to your flash drive: This protects you in case one thing goes improper.
9. Use the identical UEFI utility to pick the brand new firmware picture you saved on the flash drive: Operating the firmware replace utility ought to take simply a few minutes, however make certain to not shut off your PC throughout this course of. That is important.
10. As soon as the flashing course of finishes, restart your laptop: Your up to date PC BIOS is able to rock.
Some producers supply utilities that may replace your UEFI chip from immediately inside Home windows by working an .exe file, however we strongly advocate utilizing one of many two strategies above to keep away from any issues.
Once more, updating your PC’s BIOS can present many advantages, nevertheless it’s necessary to know the dangers. Don’t contact it if there isn’t a transparent, compelling motive to replace your UEFI firmware. That mentioned, if you wish to drop in a more moderen CPU into an older motherboard, then it’s clear {that a} BIOS replace lies in your future.
[ad_2]
Source link


